我使用了两个插件来完成,这两个功能,一个插件是react-native-tab-navigator,另一个是官方推荐react-navigation
我们先介绍底部tabbar,这里我们使用插件react-native-tab-navigator
安装:
|
1 |
npm install react-native-tab-navigator --save |
直接上页面代码了:setup.js文件
|
1 2 3 4 5 6 7 8 9 10 11 12 13 14 15 16 17 18 19 20 21 22 23 24 25 26 27 28 29 30 31 32 33 34 35 36 37 38 39 40 41 42 43 44 45 46 47 48 49 50 51 52 53 54 55 56 57 58 59 60 61 62 63 64 65 66 |
import React, { Component } from 'react'; import { StyleSheet, Text, View, Image } from 'react-native'; import TabNavigator from 'react-native-tab-navigator'; import {HomeScreen} from './src/HomeScreen'; import {CartScreen} from './src/CartScreen'; import {ProfileScreen} from './src/ProfileScreen'; export default class setup extends Component { constructor() { super(); this.state = { selectedTab: 'home', } } render() { return ( <TabNavigator> <TabNavigator.Item selected={this.state.selectedTab === 'home'} title="Home" renderIcon={() => <Image style={styles.icon} source={require('./image/home-off.png')}/>} renderSelectedIcon={() => <Image style={styles.icon} source={require('./image/home-on.png')} />} onPress={() => this.setState({ selectedTab: 'home' })}> <HomeScreen/> </TabNavigator.Item> <TabNavigator.Item selected={this.state.selectedTab === 'cart'} title="Cart" renderIcon={() => <Image style={styles.icon} source={{uri:'https://raw.githubusercontent.com/EastWorld/wechat-app-mall/master/images/nav/cart-off.png'}} />} renderSelectedIcon={() => <Image style={styles.icon} source={{uri:'https://raw.githubusercontent.com/EastWorld/wechat-app-mall/master/images/nav/cart-on.png'}} />} onPress={() => this.setState({ selectedTab: 'cart' })}> <CartScreen/> </TabNavigator.Item> <TabNavigator.Item selected={this.state.selectedTab === 'profile'} title="Profile" renderIcon={() => <Image style={styles.icon} source={{uri:'https://raw.githubusercontent.com/EastWorld/wechat-app-mall/master/images/nav/order-off.png'}} />} renderSelectedIcon={() => <Image style={styles.icon} source={{uri:'https://raw.githubusercontent.com/EastWorld/wechat-app-mall/master/images/nav/order-on.png'}} />} //renderBadge={() => <CustomBadgeView />} onPress={() => this.setState({ selectedTab: 'profile' })}> <ProfileScreen/> </TabNavigator.Item> </TabNavigator> ); } } const styles = StyleSheet.create({ icon: { width: 22, height: 22 }, }); |
我们创建HomeScreen
|
1 2 3 4 5 6 7 8 9 10 11 12 13 14 15 16 17 18 19 20 21 22 23 24 25 26 27 28 29 30 31 32 33 34 35 36 37 |
import React ,{ Component } from 'react'; import { StyleSheet, Text, View } from 'react-native'; export class HomeScreen extends Component { render() { return ( <View style={styles.container} > <Text>首页</Text> </View> ); } } const styles = StyleSheet.create({ container: { flex: 1, justifyContent: 'center', alignItems: 'center', backgroundColor: '#F5FCFF', }, welcome: { fontSize: 20, textAlign: 'center', margin: 10, }, instructions: { textAlign: 'center', color: '#333333', marginBottom: 5, }, }); |
其他两个cart 和profile文件基本样式都差不多,只是修改一下类名和text内容即可。
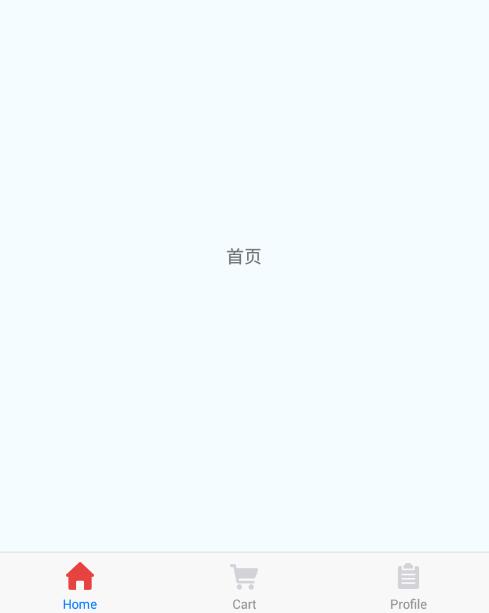
好了,底部的tabbar已经大功告成了。点击试试吧。
下面,我们希望点击,首页字,能够跳转到其他页面,这如何操作呢?
就要使用我们的下一个官方导航react-navigation。
安装:
|
1 |
npm install --save react-navigation |
在HomeScreen中加入:
|
1 |
import { StackNavigator } from 'react-navigation'; |
整体代码如下:
|
1 2 3 4 5 6 7 8 9 10 11 12 13 14 15 16 17 18 19 20 21 22 23 24 25 26 27 28 29 30 31 32 33 34 35 36 37 38 39 40 41 42 43 44 45 46 47 48 |
import { StackNavigator, } from 'react-navigation'; import { ItemScreen } from './ItemScreen'; class HomeScreen extends Component { static navigationOptions = { title: '首页', }; render() { const { navigate } = this.props.navigation; return ( <View style={styles.container} > <Text onPress={() => navigate('item')} >首页</Text> </View> ); } } const styles = StyleSheet.create({ container: { flex: 1, justifyContent: 'center', alignItems: 'center', backgroundColor: '#F5FCFF', }, welcome: { fontSize: 20, textAlign: 'center', margin: 10, }, instructions: { textAlign: 'center', color: '#333333', marginBottom: 5, }, }); const HomeApp = StackNavigator({ home: {screen: HomeScreen}, item: {screen: ItemScreen}, }); export default HomeApp; |
ItemScreen与CartScreen样子是一样的。
setup.js也小有更改:
|
1 2 3 4 5 6 7 8 9 10 11 12 13 14 15 16 17 18 19 20 21 22 23 24 25 26 27 28 29 30 31 32 33 34 35 36 |
import { StackNavigator, } from 'react-navigation'; import HomeApp from './src/HomeScreen'; ....... import { ItemScreen } from './src/ItemScreen'; ........ selected={this.state.selectedTab === 'home'} title="首页" titleStyle={styles.tabText} selectedTitleStyle={styles.selectedTabText} ........ onPress={() => this.setState({ selectedTab: 'home' })}> <HomeApp navigation={this.props.navigation} /> </TabNavigator.Item> ............ const styles = StyleSheet.create({ tabText: { color: "#999999", fontSize: 13 }, selectedTabText: { color: "red", fontSize: 13 }, icon: { width: 22, height: 22 }, }); |
好了,看看效果吧。