twig是一个很棒的模板引擎,最棒的php模板引擎。它能够很灵活的组织我们的html代码并能够自定义函数等,给用户呈现一个很友好的页面。现在开始,还记得上一章节的代码吗?今天我们就把它按部就班的放到twig中并用symfony运行喽!
第一步,新建一个bundle
新建一个bundle,要输入以下命令
|
1 |
php app/console generate:bundle --namespace=Nlc/InformationBundle |
会出现以下配置信息,下面详细解释如何填写配置
|
1 2 3 4 5 6 7 8 9 10 11 12 13 14 15 16 17 18 19 20 21 22 23 24 25 26 27 28 29 30 31 32 33 34 35 36 37 38 39 40 41 42 43 44 45 46 47 48 49 50 51 52 53 |
Welcome to the Symfony2 bundle generator //欢迎使用symfony2 bundle In your code, a bundle is often referenced by its name. It can be the concatenation of all namespace parts but it's really up to you to come up with a unique name (a good practice is to start with the vendor name). Based on the namespace, we suggest NlcInformationBundle. //建议使用NlcInformationBundle作为namespace名称 Bundle name [NlcInformationBundle]: //你的bundle名称 The bundle can be generated anywhere. The suggested default directory uses the standard conventions. //bundle能够放置到任意位置.建议还是不要更改遵循惯例. Target directory [C:/webroot/Symfony/src]: //目录 Determine the format to use for the generated configuration. //确定生成配置的格式 Configuration format (yml, xml, php, or annotation): annotation //配置格式(在这里我们选择 annotation ) To help you get started faster, the command can generate some code snippets for you. //为了让你更快上手,这个命令给你生成了一些代码段。 Do you want to generate the whole directory structure [no]? yes //你是否要生成整个目录结构 这里我们需要改写成 yes Summary before generation You are going to generate a "Nlc\InformationBundle\NlcInformationBundle" bundle in "C:/webroot/Symfony/src/" using the "annotation" format. //你要生成一个Nlc\InformationBundle\NlcInformationBundle在C:/webroot/symfony/src文件夹并使用annotation格式 Do you confirm generation [yes]? //你确定吗? Bundle generation Generating the bundle code: OK //生成bundle代码已经ok Checking that the bundle is autoloaded: OK //检查这个bundle的自动加载情况已经ok Confirm automatic update of your Kernel [yes]? //是否自动更新你的Kernel? Enabling the bundle inside the Kernel: OK //bundle已经在Kernel内部 Confirm automatic update of the Routing [yes]? //是否自动更新路由器? Importing the bundle routing resource: OK //已经添加了bundle路由文件 You can now start using the generated code! |
第二步,将html代码装载到twig引擎中
在 src\Nlc\InformationBundle\Resources\views 路径下创建两个twig文件,作为login和admin的基础模板
base.html.twig 作为login页面的基础模板
|
1 2 3 4 5 6 7 8 9 10 11 12 13 14 15 16 17 18 19 20 21 22 23 24 25 |
<!DOCTYPE html> <html> <head> <meta http-equiv="Content-Type" content="text/html; charset=utf-8" /> <meta name="viewport" content="width=device-width, initial-scale=1"> <title>信息资料管理</title> <!-- 新 Bootstrap 核心 CSS 文件 --> <link rel="stylesheet" href="http://cdn.bootcss.com/bootstrap/3.2.0/css/bootstrap.min.css"> <!-- 可选的Bootstrap主题文件(一般不用引入) --> <link rel="stylesheet" href="http://cdn.bootcss.com/bootstrap/3.2.0/css/bootstrap-theme.min.css"> <!-- jQuery文件。务必在bootstrap.min.js 之前引入 --> <script src="http://cdn.bootcss.com/jquery/1.11.1/jquery.min.js"></script> <!-- 最新的 Bootstrap 核心 JavaScript 文件 --> <script src="http://cdn.bootcss.com/bootstrap/3.2.0/js/bootstrap.min.js"></script> </head> <body> {% block itembody %} {% endblock %} </body> </html> |
layout.html.twig作为admin页面的基础模板
|
1 2 3 4 5 6 7 8 9 10 11 12 13 14 15 16 17 18 19 20 21 22 23 24 25 26 27 28 |
<!DOCTYPE html> <html> <head> <meta http-equiv="Content-Type" content="text/html; charset=utf-8" /> <meta name="viewport" content="width=device-width, initial-scale=1"> <title>信息资料管理</title> <!-- 新 Bootstrap 核心 CSS 文件 --> <link rel="stylesheet" href="http://cdn.bootcss.com/bootstrap/3.2.0/css/bootstrap.min.css"> <!-- 可选的Bootstrap主题文件(一般不用引入) --> <link rel="stylesheet" href="http://cdn.bootcss.com/bootstrap/3.2.0/css/bootstrap-theme.min.css"> <!-- jQuery文件。务必在bootstrap.min.js 之前引入 --> <script src="http://cdn.bootcss.com/jquery/1.11.1/jquery.min.js"></script> <!-- 最新的 Bootstrap 核心 JavaScript 文件 --> <script src="http://cdn.bootcss.com/bootstrap/3.2.0/js/bootstrap.min.js"></script> </head> <body> {% block itemtophead %} {% endblock %} <div class="container-fluid"> {% block itemcontent %}Index{% endblock %} </div> {% block itemadd %}{% endblock %} {% block itemupdate %}{% endblock %} </body> </html> |
然后把不同的布局模块化,分别把 顶部导航、左导航、列表区域、添加页面和编辑页面分成不同的twig模板,当程序需要时将其引入到相应的模板中。
顶部导航页面命名为itemtophead.html.twig,在src\Nlc\InformationBundle\Resources\views中新建一个文件夹Information,并把itemtophead.html.twig放入其中
|
1 2 3 4 5 6 7 8 9 10 11 12 13 14 15 16 17 18 19 20 21 22 23 24 25 26 27 28 29 30 31 32 33 34 35 36 |
<style> @media (min-width: 970px) { .container-fluid .nav-sidebar{display:block;} } .nav-sidebar > .active > a, .nav-sidebar > .active > a:hover, .nav-sidebar > .active > a:focus { color: #fff; background-color: #428bca; } </style> <nav id="navbar-example" class="navbar navbar-default navbar-static" role="navigation"> <div class="container-fluid"> <!--手机浏览时显示--> <button class="navbar-toggle" type="button" data-toggle="collapse" data-target=".nav-collapse"> <span class="sr-only">Toggle navigation</span> <span class="icon-bar"></span> <span class="icon-bar"></span> <span class="icon-bar"></span> </button> <!--手机浏览时显示 结束--> <a class="navbar-brand" href="#">信息管理</a> <ul class="nav pull-right" > <!-- 登录的用户信息 --> <li class="dropdown"> <a href="#" class="dropdown-toggle" data-toggle="dropdown"> <img alt="" src="images/avatar1_small.jpg"> <span>XMAN</span> <span class="caret"></span> </a> <ul class="dropdown-menu"> <li><a href="login.html"><i class="icon-key"></i>退出</a></li> </ul> </li> <!-- 登录的用户信息 结束 --> </ul> </div><!-- /.container-fluid --> </nav> |
左导航页面命名为itemleftmenu.html.twig,也把它放入到src\Nlc\InformationBundle\Resources\views\Information路径中
|
1 2 3 4 5 6 7 8 |
<div class="col-sm-2"> <ul class="nav nav-sidebar nav-collapse collapse in"> <li class="active"><a href="#">全公司人员</a></li> <li><a href="#"> 销售人员</a></li> <li><a href="#"> 技术人员</a></li> <li><a href="#"> 后勤人员</a></li> </ul> </div> |
列表区域页面命名为itemrightlist.html.twig,也把它放入到src\Nlc\InformationBundle\Resources\views\Information路径中
|
1 2 3 4 5 6 7 8 9 10 11 12 13 14 15 16 17 18 19 20 21 22 23 24 25 26 27 28 29 30 31 32 33 34 35 36 37 38 39 40 41 42 43 44 45 46 47 48 49 50 51 52 53 54 55 56 57 58 59 60 61 62 63 64 65 66 67 68 |
<div class="col-sm-10" > <div class="row"> <div class="col-xs-6" ><input type="text" class="form-control" placeholder="检索姓名"></div> <div class="col-xs-3" ><input class="btn btn-default" type="submit" value="搜索"></div> <div class="col-xs-3 "><input class="btn btn-default pull-right" type="submit" data-toggle="modal" data-target="#myModal" value="资料录入"></div> </div> <div class="row"> <table class="table"> <thead> <tr> <th>#</th> <th>照片</th> <th>姓名</th> <th>性别</th> <th>年龄</th> <th>学历</th> <th>简历下载</th> <th></th> </tr> </thead> <tbody> <tr> <td>1</td> <td><img src="images/avatar1_small.jpg" /></td> <td>张三</td> <td>男</td> <td>25</td> <td>研究生</td> <td>张三简历<a>下载</a></td> <td><a href="javascript:;" data-toggle="modal" data-target="#myModalUpdate">编辑</a></td> </tr> <tr> <td>2</td> <td><img src="images/avatar1_small.jpg" /></td> <td>李四</td> <td>女</td> <td>26</td> <td>研究生</td> <td>李四简历<a>下载</a></td> <td><a href="javascript:;" data-toggle="modal" data-target="#myModalUpdate">编辑</a></td> </tr> <tr> <td>3</td> <td><img src="images/avatar1_small.jpg" /></td> <td>王五</td> <td>男</td> <td>46</td> <td>研究生</td> <td>王五简历<a>下载</a></td> <td><a href="javascript:;" data-toggle="modal" data-target="#myModal">编辑</a></td> </tr> </tbody> </table> </div> <div class="row"> <ul class="pagination"> <li><a href="#">«</a></li> <li><a href="#">1</a></li> <li><a href="#">2</a></li> <li><a href="#">3</a></li> <li><a href="#">4</a></li> <li><a href="#">5</a></li> <li><a href="#">»</a></li> </ul> </div> </div> </div> |
添加页面命名为itemadd.html.twig,也把它放入到src\Nlc\InformationBundle\Resources\views\Information路径中
|
1 2 3 4 5 6 7 8 9 10 11 12 13 14 15 16 17 18 19 20 21 22 23 24 25 26 27 28 29 30 31 32 33 34 35 36 37 38 39 40 41 42 43 44 45 46 47 48 49 50 51 52 |
<!-- Modal 录入表单--> <div class="modal fade" id="myModal" tabindex="-1" role="dialog" aria-labelledby="myModalLabel" aria-hidden="true"> <div class="modal-dialog"> <div class="modal-content"> <div class="modal-header"> <button type="button" class="close" data-dismiss="modal"><span aria-hidden="true">×</span><span class="sr-only">关闭</span></button> <h4 class="modal-title" id="myModalLabel">人员信息录入</h4> </div> <div class="modal-body"> <!--内容区域--> <form role="form"> <div> <div class="form-group col-xs-4"> <label for="exampleInputName">姓名</label> <input type="text" class="form-control" id="exampleInputName" placeholder="请输入姓名"> </div> <div class="form-group col-xs-4"> <label for="exampleInputSex">性别</label> <input type="password" class="form-control" id="exampleInputSex" placeholder="请输入性别"> </div> <div class="form-group col-xs-4"> <label for="exampleInputAge">年龄</label> <input type="password" class="form-control" id="exampleInputAge" placeholder="请输入年龄"> </div> </div> <div class="form-group col-xs-12"> <label for="exampleInputEducation">学历</label> <input type="password" class="form-control" id="exampleInputEducation" placeholder="请输入学历"> </div> <div class="form-group"> <label for="exampleInputImage">上传照片</label> <input type="file" id="exampleInputImage"> <p class="help-block">不要上传超过1M的照片并且上传完成后不可编辑.</p> </div> <div class="form-group"> <label for="exampleInputFile">上传简历</label> <input type="file" id="exampleInputFile"> <p class="help-block">不要上传超过1M的附件并且上传完成后不可编辑.</p> </div> <!--内容区域结束--> </div> <div class="modal-footer"> <button type="button" class="btn btn-default" data-dismiss="modal">关闭</button> <button type="button" class="btn btn-primary">保存</button> </div> </form> </div> </div> </div> <!--end Modal 录入表单--> |
编辑页面命名为itemupdate.html.twig,也把它放入到src\Nlc\InformationBundle\Resources\views\Information路径中
|
1 2 3 4 5 6 7 8 9 10 11 12 13 14 15 16 17 18 19 20 21 22 23 24 25 26 27 28 29 30 31 32 33 34 35 36 37 38 39 40 41 42 43 44 45 46 |
<!-- Modal 编辑表单--> <div class="modal fade" id="myModalUpdate" tabindex="-1" role="dialog" aria-labelledby="myModalLabel" aria-hidden="true"> <div class="modal-dialog"> <div class="modal-content"> <div class="modal-header"> <button type="button" class="close" data-dismiss="modal"><span aria-hidden="true">×</span><span class="sr-only">关闭</span></button> <h4 class="modal-title" id="myModalLabel">人员信息录入</h4> </div> <div class="modal-body"> <!--内容区域--> <form role="form"> <div class="row"> <div class="form-group col-xs-4"> <label for="exampleInputName">姓名</label> <input type="text" class="form-control" id="exampleInputName" placeholder="请输入姓名"> </div> <div class="form-group col-xs-4"> <label for="exampleInputSex">性别</label> <input type="password" class="form-control" id="exampleInputSex" placeholder="请输入性别"> </div> <div class="form-group col-xs-4"> <label for="exampleInputAge">年龄</label> <input type="password" class="form-control" id="exampleInputAge" placeholder="请输入年龄"> </div> </div> <div class="row"> <div class="form-group col-xs-12"> <label for="exampleInputEducation">学历</label> <input type="password" class="form-control" id="exampleInputEducation" placeholder="请输入学历"> </div> </div> <!--内容区域结束--> </div> <div class="modal-footer"> <button type="button" class="btn btn-default" data-dismiss="modal">关闭</button> <button type="button" class="btn btn-primary">保存</button> </div> </form> </div> </div> </div> <!--end Modal 编辑表单--> |
好了基本的我们已经完成了,下面我们把它们组装到一起吧。
在 src\Nlc\InformationBundle\Resources\views\Information 新建一个login.html.twig 作为登录页面
|
1 2 3 4 5 6 7 8 9 10 11 12 13 14 15 16 17 18 19 |
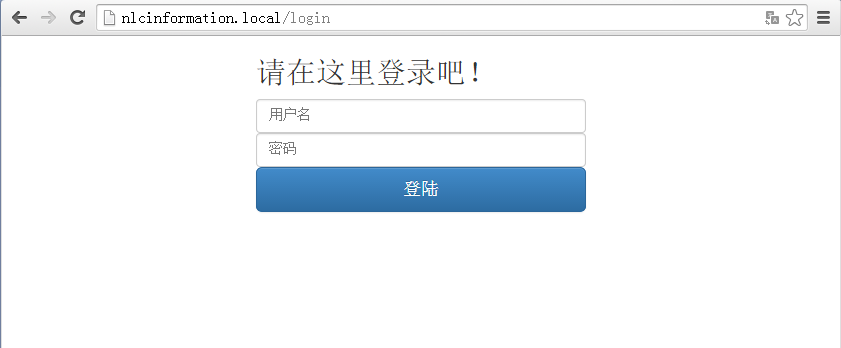
{% extends "NlcInformationBundle::base.html.twig" %} {% block itembody %} <style> form{max-width: 330px; margin:0 auto;} form .form-control{ padding-bottom:10px;} </style> <div class="container"> <form role="form"> <h2>请在这里登录吧!</h2> <input type="email" class="form-control" placeholder="用户名" required autofocus> <input type="password" class="form-control" placeholder="密码" required> <button class="btn btn-lg btn-primary btn-block" type="submit">登陆</button> </form> </div> <!-- /container --> {% endblock %} |
在 src\Nlc\InformationBundle\Resources\views\Information 新建一个admin.html.twig 作为管理页面,把需要的模块加入进来
|
1 2 3 4 5 6 7 8 9 10 11 12 13 14 15 |
{% extends "NlcInformationBundle::layout.html.twig" %} {% block itemtophead %} {% include "NlcInformationBundle:Information:itemtophead.html.twig" %} {% endblock %} {% block itemcontent %} {% include "NlcInformationBundle:Information:itemleftmenu.html.twig" %} {% include "NlcInformationBundle:Information:itemrightlist.html.twig" %} {% endblock %} {% block itemadd %} {% include "NlcInformationBundle:Information:itemadd.html.twig" %} {% endblock %} {% block itemupdate %} {% include "NlcInformationBundle:Information:itemupdate.html.twig" %} {% endblock %} |
第三步,在controller中渲染模板并浏览页面
打开 DefaultController.php 添加以下代码
|
1 2 3 4 5 6 7 8 9 10 11 12 13 14 15 16 17 18 19 20 |
... ... /** * @Route("/login") * @Template("NlcInformationBundle:Information:login.html.twig") */ public function LoginAction() { return array(); } /** * @Route("/admin") * @Template("NlcInformationBundle:Information:admin.html.twig") */ public function AdminAction() { return array(); } ... ... |
因为使用annotation,所以@Route(“”) 指引应用程序的路由,@Template(“”) 来渲染应用程序的模板。
具体控制器的annotation配置和使用可查看
http://symfony.com/doc/current/bundles/SensioFrameworkExtraBundle/index.html
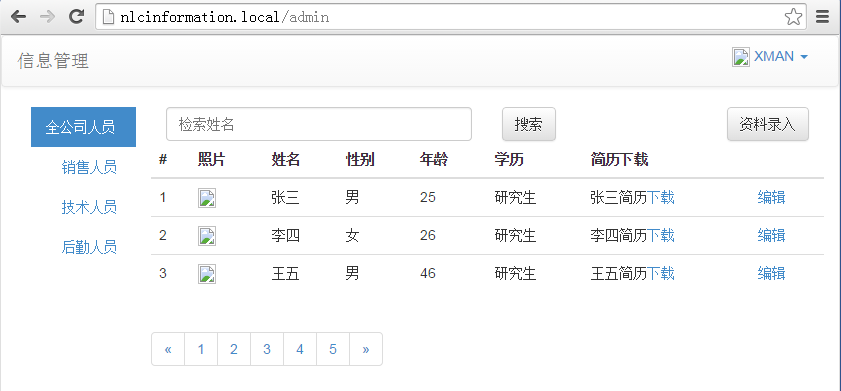
好了,我们打开浏览器,访问 http://nlcinformation.local/login和http://nlcinformation.local/admin

管理页面

第四步,生成资源文件
虽然http://nlcinformation.local/admin页面可以浏览,但是还是有一些问题,也就是说图片不能显示,我们把图片资源拷贝到目录(src\Nlc\InformationBundle\Resources\public\images\avatar1_small.jpg)
再次浏览还是没有,为什么呢,因为我们的web目录资源下还没有图片资源,那怎么办
我们只需要生成相应的资源即可,要输入下面的命令:
|
1 |
php app/console assets:install web --symlink |
你的资源会生成到web\bundles\nlcinformation目录下
然后修改img的src代码
将 itemtophead.html.twig 和 itemrightlist.html.twig 中
|
1 |
<img src="images/avatar1_small.jpg" /> |
更改为
|
1 |
<img alt="" src="{{ asset('bundles/nlcinformation/images/avatar1_small.jpg') }}" /> |
ok再次浏览已经可以看到图片了。

我以这个方式( http://nlcinformation.local/login和http://nlcinformation.local/admin)登录,出现找不到服务器,请问怎么解决呢?
试试检查
1.不知你是否已经rewrite成功
2.或者你尝试 http://nlcinformation.local/app_dev.php/login 试一试
3.检查controller文件的Route是否正确
symfony2实战入门信息录入这几篇可以了解symfony的CURD(增删改查)和模板的简单使用。
但是由于时间原因我并没有把模板和symfony程序逻辑整合到一起(对此表示抱歉),也就是所他们是分离的,如果想实现截图效果并真正运行,可能后面需要你根据理解把模板整合到相应的twig中,已实现最终效果。
《jobeet》是一个完整体系并知名的学习案例,得到很多初学symfony开发者的喜爱
关于后面的登陆和注册深入实现你可以查看《KU案例》会对你有很大帮助