FOSCommentBundle是symfony2众多bundle中的一员,他有着强大的评论功能。
安装
安装主要分为四个部分
一. 设置bundle
1.下载FOSCommentBundle
|
1 |
php composer.phar require friendsofsymfony/comment-bundle |
2.启用bundle
|
1 2 3 4 5 6 7 8 9 10 11 12 |
<?php // app/AppKernel.php public function registerBundles() { $bundles = array( // ... new FOS\RestBundle\FOSRestBundle(), new FOS\CommentBundle\FOSCommentBundle(), new JMS\SerializerBundle\JMSSerializerBundle($this), ); } |
3. 查看是否开启http_method_override
|
1 2 |
framework: http_method_override: true |
4. 查看是否开启翻译
|
1 2 |
framework: translator: ~ |
二. 设置doctrine的ORM
FOSCommentBundle没有提供具体的评论类,这需要自己去创建并继承他提供的基类。这里需要创建两个entity类,分别为Comment和Thread
创建Comment.php
|
1 2 3 4 5 6 7 8 9 10 11 12 13 14 15 16 17 18 19 20 21 22 23 24 25 26 27 28 29 |
<?php // src/MyProject/MyBundle/Entity/Comment.php namespace MyProject\MyBundle\Entity; use Doctrine\ORM\Mapping as ORM; use FOS\CommentBundle\Entity\Comment as BaseComment; /** * @ORM\Entity * @ORM\ChangeTrackingPolicy("DEFERRED_EXPLICIT") */ class Comment extends BaseComment { /** * @ORM\Id * @ORM\Column(type="integer") * @ORM\GeneratedValue(strategy="AUTO") */ protected $id; /** * Thread of this comment * * @var Thread * @ORM\ManyToOne(targetEntity="MyProject\MyBundle\Entity\Thread") */ protected $thread; } |
创建Thread.php
|
1 2 3 4 5 6 7 8 9 10 11 12 13 14 15 16 17 18 19 20 21 22 |
<?php // src/MyProject/MyBundle/Entity/Thread.php namespace MyProject\MyBundle\Entity; use Doctrine\ORM\Mapping as ORM; use FOS\CommentBundle\Entity\Thread as BaseThread; /** * @ORM\Entity * @ORM\ChangeTrackingPolicy("DEFERRED_EXPLICIT") */ class Thread extends BaseThread { /** * @var string $id * * @ORM\Id * @ORM\Column(type="string") */ protected $id; } |
配置你的应用程序
|
1 2 3 4 5 6 7 8 9 10 11 |
# app/config/config.yml fos_comment: db_driver: orm class: model: comment: MyProject\MyBundle\Entity\Comment thread: MyProject\MyBundle\Entity\Thread assetic: bundles: [ "FOSCommentBundle" ] |
注意:将MyProject\MyBundle\替换成自己的bundle。
三. 在路由app/config/routing.yml中引入
|
1 2 3 4 5 |
fos_comment_api: type: rest resource: "@FOSCommentBundle/Resources/config/routing.yml" prefix: /api defaults: { _format: html } |
四. 在twig模板中使用
|
1 |
{% include 'FOSCommentBundle:Thread:async.html.twig' with {'id': 'foo'} %} |
foo是一个标识,来确定调用和展示篇文章的评论,可以用程序灵活替换。
加入jquery
|
1 |
<script src="http://code.jquery.com/jquery-1.11.3.js"></script> |
五. 运行命令
|
1 2 |
php app/console doctrine:schema:update --force php app/console assetic:dump |
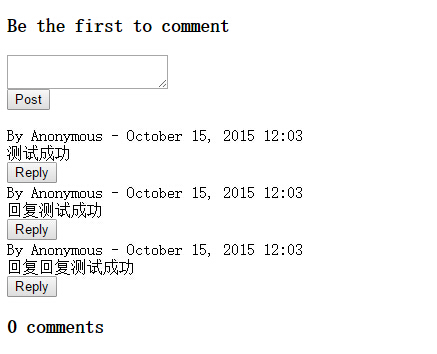
运行程序你会看到页面
配置
1.添加样式
|
1 2 3 4 5 6 7 8 |
<style> .fos_comment_comment_show{ margin: 20px 0;} .fos_comment_comment_metas{ font-size: 16px;margin-top: 0; margin-bottom: 5px; font-weight: 500;} .fos_comment_comment_body{font-size: 14px;} .fos_comment_comment_replies{ margin-left: 20px; } .fos_comment_comment_form_holder h3{ font-size: 16px;} </style> {% include 'FOSCommentBundle:Thread:async.html.twig' with {'id': 'foo'} %} |
我们就会看到树状结构了
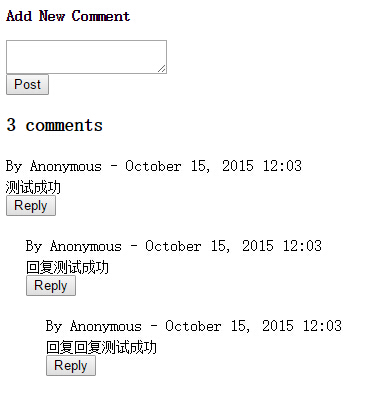
提示:官方也有添加样式的方法和css,不多说了。
如果有大修改可以在app/Resources/SonataAdminBundle下替换默认模板。
2. 添加用户
现在的回复全部都是Anonymous状态,我们希望我们的Entity用户能够显示在上面。
你需要在comment.php添加
|
1 2 3 4 5 6 7 8 9 10 11 12 13 14 15 16 17 18 19 20 21 22 23 24 25 26 27 28 29 30 31 32 33 34 35 36 37 38 39 40 41 42 43 44 |
<?php // src/MyProject/MyBundle/Entity/Comment.php namespace MyProject\MyBundle\Entity; use Doctrine\ORM\Mapping as ORM; use FOS\CommentBundle\Entity\Comment as BaseComment; use FOS\CommentBundle\Model\SignedCommentInterface; use Symfony\Component\Security\Core\User\UserInterface; /** * @ORM\Entity */ class Comment extends BaseComment implements SignedCommentInterface { // .. fields /** * Author of the comment * * @ORM\ManyToOne(targetEntity="MyProject\MyBundle\Entity\User") * @var User */ protected $author; public function setAuthor(UserInterface $author) { $this->author = $author; } public function getAuthor() { return $this->author; } public function getAuthorName() { if (null === $this->getAuthor()) { return 'Anonymous'; } return $this->getAuthor()->getUsername(); } } |
并在配置app/config/config.yml
|
1 2 |
assetic: bundles: ["FOSCommentBundle","AppBundle" ] |
AppBundle要替换成自己的bundle
输入命令更新数据库
|
1 |
php app/console doctrine:schema:update --force |
3.添加ACL
我们不希望匿名用户评论,FOSCommentBundle有很强大的权限控制方式
首先,在symfony中开启ACL
|
1 2 3 4 |
# app/config/security.yml security: acl: connection: default |
运行命令
|
1 |
php app/console init:acl |
启用FOSComment的ACL功能 并进行的配置
|
1 2 3 4 5 6 7 8 9 10 11 12 13 |
# app/config/config.yml 覆盖ACL服务 fos_comment: acl: true service: manager: thread: fos_comment.manager.thread.acl comment: fos_comment.manager.comment.acl vote: fos_comment.manager.vote.acl acl: thread: fos_comment.acl.thread.roles comment: fos_comment.acl.comment.roles vote: fos_comment.acl.vote.roles |
去改变每个角色的特定操作和显示
|
1 2 3 4 5 6 7 8 9 10 11 12 13 14 15 16 17 18 19 |
# app/config/config.yml fos_comment: acl_roles: comment: create: IS_AUTHENTICATED_ANONYMOUSLY view: IS_AUTHENTICATED_ANONYMOUSLY edit: ROLE_ADMIN delete: ROLE_ADMIN thread: create: IS_AUTHENTICATED_ANONYMOUSLY view: IS_AUTHENTICATED_ANONYMOUSLY edit: ROLE_ADMIN delete: ROLE_ADMIN vote: create: IS_AUTHENTICATED_ANONYMOUSLY view: IS_AUTHENTICATED_ANONYMOUSLY edit: ROLE_ADMIN delete: ROLE_ADMIN |
将IS_AUTHENTICATED_ANONYMOUSLY改成你需要的角色就可以(例如USER_SHOW)使匿名用户不参与评论了。
最后运行命令
|
1 |
php app/console fos:comment:installAces |
来确保ACL的正确性。
ok,就这样了。
更多详情请阅读
https://github.com/FriendsOfSymfony/FOSCommentBundle